first steps with Serverless Framework
In this article, I want to introduce you to a development framework called serverless framework, helping you to create your first code example using it.First of all, if you do not know, Serverless Framework is based in the concept of serverless architecture, which allows our infrastructure “to exist” only when necessary, that is, to be created on demand, as a response to an event. If you want to know more about this kind of architecture, you can read this old article in which I explain its main features in detail (in spanish).
What is Serverless Framework?
It is a set of tools designed to develop serverless architectures easily, avoiding us wasting time on our infrastructure. Serverless Framework is based in three main concepts: functions, events and services, but depending on the cloud provider we have chosen, they can be more.
Functions
We understand functions as a piece of code deployed in the cloud that normally performs a single task, such as saving user profile data in our database, read a folder or get an item list.
Events
Events are those mechanisms that triggers the execution of a function, such as a http request, a cron job, a message, etc.
Services
A service is the Framework’s unit of organization, so we can think of it as a project file.This framework allows the user to build functions using different programming languages (python, node.js, java, scala o C#) and deploy them on its favorite cloud service provider (Azure, AWS, Google Cloud, etc..). It is also an open-source framework and it has rated with more than 19.000 stars in Github.
Installation
To elaborate this article I have chosen AWS as cloud provider and node.js, but in its official page you can find configuration guides for the rest of providers and languages.
Node.js
First of all, we have to install node.js in our computer, not only for programming, but to install the serverless cli. If you do not have already, you can download this runtime here.
Framework Serverless
We will install serverless through npm, included in Node.js<pre>npm install -g serverless</pre>
AWS CLI
To install AWS cli you can follow the instructions in this guide. In this case, we will use the Ubuntu documentation.We download the installer :
$ curl https://s3.amazonaws.com/aws-cli/awscli-bundle.zip"-o awscli-bundle.zip"
Then unzip:
$ unzip awscli-bundle.zip
Finally, we install the executable file:
$ sudo ./awscli-bundle/install -i /usr/local/aws -b /usr/local/bin/aws
Configuration
Once we have installed the dependencies, we must configure our computer to gain access to AWS components.
Create IAM user
To access to our AWS account through Framework Serverless, first we have to create a new user with admin access (this is not recommended for production environments but this choice will serve us well in our first steps).To do this, we must enter our AWS console and then go to IAM section. Once there, we must create a new user “serverless_admin”, checking “programmatic access” as access type option and adding “AdministratorAccess” permissions.  Once you have created your profile, copy your AWS API Key and Secret, so you will need it in a later step.
Configuring AWS credentials
Thanks to the AWS integrated CLI, we can set the account we want to use in Serverles Framework using the next command line: <pre>$ aws configure</pre>Once the command is executed, the console will request our AWS API Key and the Secret that we copied beforehand.
Let's do it!
Now, our favorite part: coding!
Creating our project
We start our serverless project, specifying the node.js template, a name and its path.
$ serverless create --template aws-nodejs --path api-serverless# Move to the new project folder$ cd api-serverless
Deploying our project
serverless deploy -v
We can also deploy a function, just in case we only have made modifications on it.
serverless deploy function -f hello
Another usefull commands
There are some other commands we can use, such as:
- Invoking the functions
- Using this command, we can call the previously deployed function.
- Logs display
-
serverless logs -f hello -t - Project deletion
- This will erase our project in AWS and all its dependencies. However, it does not affect local files, as they require to be deleted manually.
serverless remove
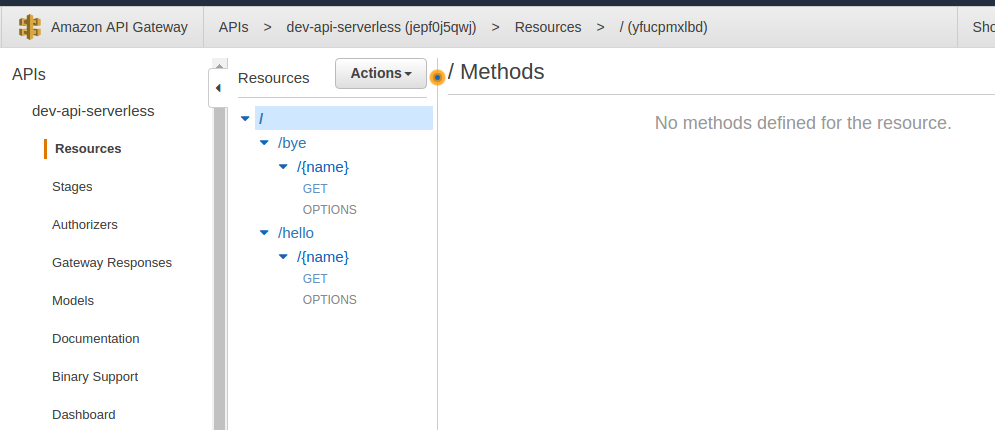
To this point, we have summarized some basic contents we can find in the Serverless Framework quick start guide, dealing with installation, AWS config, setting, examples... However, we can add another feature to improve our example, making it much more useful: we will create an API that executes our function
- https://jepf0j5qwj.execute-api.eu-west-1.amazonaws.com/dev/hello/tony
- https://jepf0j5qwj.execute-api.eu-west-1.amazonaws.com/dev/bye/tony
serverless invoke -f hello -l
Creating and endpoint
In order to do this, we modify base file, of our project "serverless.yml", adding these lines:
functions:
  hello:
    handler: handler.hello
# Events configuration:
# In this case, we are going to configure
# the method with path /hello/{name},where {name} its a string
# we send by requests
    events:
      - http:
          path: hello/{name}
          method: get
          cors: true

# We make and identical endpoint but with /bye/{name} path


  bye:
    handler: handler.bye
    events:
      - http:
          path: bye/{name}
          method: get
          cors: true
'use strict';
module.exports.hello = (event, context, callback) => {

    const name = event.pathParameters.name;

        const response = {
            statusCode: 200,
            body: JSON.stringify({
            message: '¡Hola '+ name+'!',
            input: event,
        }),
    };

callback(null, response);

};

module.exports.bye = (event, context, callback) => {

const name = event.pathParameters.name;

    const response = {
        statusCode: 200,
        body: JSON.stringify({
        message: '¡Adios '+ name+'!',
        input: event,
        }),
    };

callback(null, response);

};
service: api-serverless #project name

provider:
  name: aws
  runtime: nodejs6.10 #current nodejs version

  stage: dev  #we modify the value of the Stage
  #We want to deploy our project in EU(Ireland) region
  region: eu-west-1
 In this section, we can check all the urls to invoke our different functions. The urls format use to follow this pattern:
https://urlAWS/stage/path
